
How to Record Artists Remotely with Audiomovers (Templates Included)

If you're anything like me, working during Covid really wasn't that different to working any other time. It generally consisted of me spending weeks alone in my studio producing and mixing music for my clients, with the day-to-day punctuated by a recording session or a write, here and there. The major change during the lockdown was that even those recording sessions weren't happening. Artists were not able to travel, musicians were stuck at home, and I, while in my comfortable setup, was finding it difficult to get music made with other people. The move to add a remote recording option was necessary. Luckily, with modern technology and hardware, its actually fairly easy to set up a recording environment that's not substantively different than being in a control room with the talent in the live room.
In this article, I will walk you through how I have run remote tracking sessions. It assumes you have a working knowledge of audio production. Specifically, I'll show you how to:
Remotely run a DAW on a client's computer to record the audio on their end.
Set up a talkback system for you to communicate with the artist(s) that automatically mutes itself when playing or recording from the DAW.
Stream the remote DAW audio and live microphones back to yourself to monitor in near real-time.
Set up a custom cue mix (that you or they can control) for the artist to monitor from while tracking.
Send yourself the session and audio files
The setup is very similar to working with someone in the live room while you're in the control room, and if you add a video call while you're doing it, its like looking through the control room window. I've run a few sessions now with this setup, and it has worked very smoothly, and I haven't run into any serious problems with it yet. I've used this method successfully on single vocal recordings, but there is no reason that you couldn't run a bigger session using the same method. You're really only limited by the gear on the client end in that regard. All of the plugins and software are free, except Audiomovers Listento plugin which is $3 for a week or $99 per year. Obviously, this dosn't include the initial cost of a DAW, interface, microphone, stand, pop filter, cable, etc will have to be factored in.
I'll include a download link for my REAPER templates at the end of the article so you can see how I have it set up. Hopefully, it saves you some time.
Getting Set Up
Gear Up
The most obvious first step is that you will have to make sure your client/artist is geared and software-d up and that their recording space is prepared/treated properly so that you can get the best sounding recordings possible. (Treating a recording space is outside the scope of this article, but there are many resources available online for how to do this with not a ton of budget and some moderate effort.)
I have done this two ways: The first is that the artist buys their own equipment; this is an area where you can add a lot of value by making sound, affordable recommendations. Then for any future sessions you have with them, they already have everything they need. The second way I have geared up a client is by shipping them everything they would need in one box. I keep a spare interface, mics, cables, stands, adapters etc. on hand for just this purpose. You could charge a deposit for the value of the gear beforehand which will be refunded when the gear is returned, or charge a rental fee or something of the like. However it works for you.
For the purposes of this write-up, I'll assume you've got all that squared away and are geared up and in a suitable recording space.
Software Up

Set up DAW on client/remote computer. You'll need to have a DAW installed on the client/remote computer in addition to your own local set up. I won't go into detail on which one to choose, that's up to you. My personal DAW of choice for this is Reaper, but this method will work in any DAW. I may sometimes refer to Bus tracks, replace that with Aux Track if you're in Pro Tools. Reaper does not have bus tracks or aux tracks - it only has tracks and they can contain anything and be routed in any way. (For an in-depth dive into Reaper and literally all of its functions, check out Kenny Gioia's channel on YouTube, ReaperMania.)
Go to https://audiomovers.com/wp/ and download and install the Audiomovers Listento plugin on both local and client computers. This is what enables live streaming of the audio from the DAW to anywhere. You get a week free to start, and its 3$ for a week (or $99 per year) when you activate it after that (license only needed to stream, not to receive.) You can also use the same license for multiple streams and multiple logins. They are an absolute gem of a company, please support them.
Download Teamviewer and install on both local and client computers.
Set up a video meeting of your choice. Zoom, Skype, Google Meet, Facetime, etc. I tend to run these on my phone with the audio muted so I can still have a visual interaction with the artist, but you could do another laptop or whatever you want.
Download the Sound Radix Muteomatic plugin and install on both local and client computers.
Setting up the Client Computer
Load Teamviewer and get the Teamviewer ID and password for the remote computer. The client can see this info from the main screen of Teamviewer.
On your computer, log in to the client computer using the ID and password. Go full screen and you'll be using their computer just like you were sitting there on it.
Use a file transfer service like Dropbox, Google Drive, or WeTransfer to send session and audio files to the remote computer. You can do this ahead of time and have the client do it to save some time.
Setting Up Streaming
What we are essentially doing here is creating a separate mix for us to monitor independently of what the artist hears on their end. Just like setting up a cue mix for a recording session.
On the Remote Computer
Routing for the Stream Bus
Load the DAW on the remote computer.
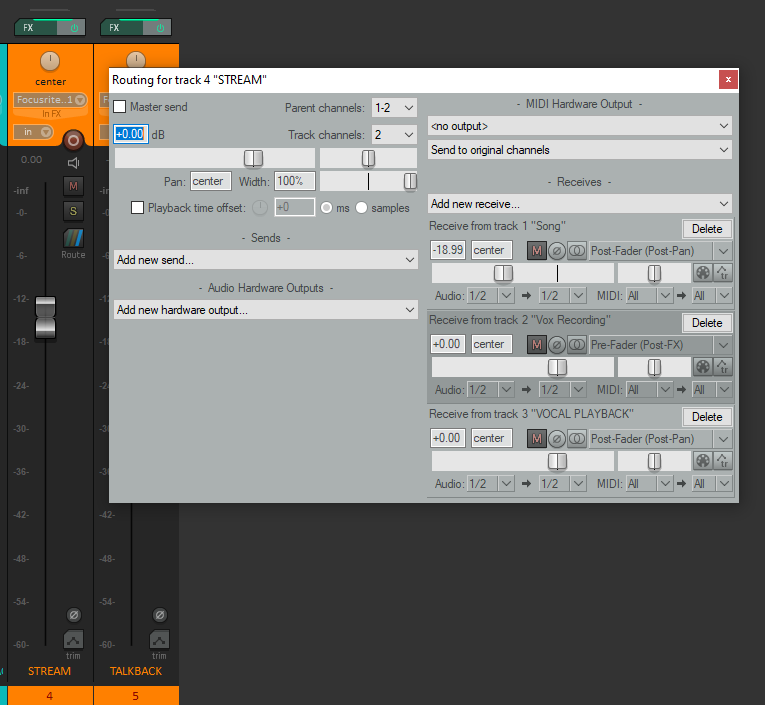
Insert a new track (Bus in Logic/Cubase/Studio One or Aux in Pro Tools) and name it "STREAM".
Put the ListenTo plugin on the bus/aux.
Set the output of this bus/aux to NO OUTPUT (Uncheck Master/Parent send in Reaper).
On any recording tracks you want to monitor live, such as live instruments or vocal, turn on Record/Input monitoring and send a PRE-FADER send to the STREAM Bus/Aux.
Send every audio track and FX return that you want to monitor to the STREAM Bus/Aux, PRE-FADER as well.
Since all sends are PRE-FADER, you can control the send levels to adjust your monitoring levels.
Open the ListenTo plugin on the STREAM Bus/Aux and name the session STREAM. Set the latency to .2 sec. The other default AAC quality options are fine for monitoring. (If you attempt to do any of the PCM (Uncompressed) quality options, you'll have to have a hefty internet connection on both ends and relax the latency setting. For this setup, I don't recommend that.)
Log in to your account, begin the transmission, and Copy the link to the stream from the ListenTo plugin. (Double check that "Clipboard Synchronization" is enabled in TeamViewer on both computers. Its under Extras>Options>Advanced.)
On your Local Computer
Load your DAW.
Insert a new track (Bus/Aux) called STREAM RECEIVE.
Put the ListenTo Reciever plugin on the STREAM RECEIVE track.
Paste the link from the remote computer and connect to the stream.
Play any audio from the remote computer and you should be able to hear it.
Setting Up a Talkback
On the Remote Computer
Insert a new track (mono bus/aux) in the DAW named TALKBACK
Put the ListenTo Receiver plugin to the bus/aux.
Add the Muteomatic plugin AFTER the ListenTo Receiver plugin. This will automatically mute the talkback when the DAW is playing or recording.
On your Local Computer
Insert a new mono audio track and name it TALKBACK
Set the input to your desk microphone and turn on Record Monitoring/Input Monitoring.
Set the TALKBACK track to NO OUTPUT.
Insert the ListenTo plugin on the track and name the session TALKBACK
Log in to your account, begin the transmission, and Copy the link to the stream from the ListenTo plugin.
Back on the remote computer DAW, paste the link into the ListenTo Receiver plugin on the TALKBACK track and connect.
Now you have a remote talkback that mutes automatically. What a time to be alive. Side note*: can this please be a standard functionality of DAWs from now on? Why do we need a plugin to do this? We really do live in a society.
Monitoring Setup for the Artist
Depending on certain hardware setups, the artist(s) will monitor differently based on what they are working with. In my setups, the artist is monitoring directly from the interface using direct monitoring on a Focusrite Scarlett or Clarett, and I'm controlling their mix using Focusrite Control software. This setup can vary quite a bit. You'll have to use your experience to set up monitoring just like you would in a normal recording situation. At any rate, the audio track they are recording to should have Record Monitoring/Input Monitoring on, with a PRE-FADER send to the STREAM Bus/Aux, and the mixer fader turned all the way down. This way, both you and the artist will be able to monitor everything live. Once you have recorded a take, if the artist would like to hear it back, just raise the fader on the recording track to send it to the main stereo out for everyone to hear.
It takes a second to wrap your mind around, but the artist is monitoring off the main stereo mix plus their direct monitoring from the interface. This way, anything you have going to the main outs is heard by the artist, so you are controlling their mix by the main faders in the remote DAW.
If recording multiple musicians at the same time, you can set up a cue mix for each of them just like you normally would, assuming you have the hardware to support the setup.
Finishing Up
After you are finished recording, use your file transfer service of choice to send the session folder and audio files from the remote computer back to yourself.
Final Thoughts
I hope this has been helpful for you. If you spot an error or have a point of clarification that you think would help others, please shoot me an email at jesse@arcseastudio.com and I'll edit the article (and credit you.) I hope you make some great music together now that distance isn't stopping you any more.
Special Thanks to Logan Joecks and Travis and Diana Schuler for being my guinea pigs as I figured out this process. The songs we recorded are not released yet, but I'll post a link up once they are. Also, thanks to Spot McCormick at https://www.spotsdrumhub.com/ for letting me experiment on a drum session. Additional thanks to this article for helping me get started and inspiring this method. Shout out to the members of the Six Figure Home Studio community who inspired this article.